The Beginners’ Guide To 3D Modelling

Whether you watch movies, ads, play video games, or even if you look at digital art, increasingly a lot of the material you can see is made using a computer.
3D modelling is at the centre stage of all the computer graphics videos and still pictures that we see everywhere, and you might have been tempted to try it out for yourself. But the field of CGI is very vast, so here we will focus on the basic aspects that you need to know about if you want to get started. We’ll see what a beginner needs to start with 3D modelling.
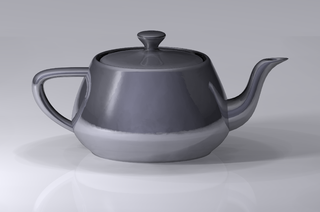
Before we talk about modelling software, it’s important to understand the various stages usually involved in creating the results that we see on the screen, whether that’s in interactive video games, or in theatres. Everything starts with 3D models, also called meshes. These are 3D representations of objects, whether they be a car, building, or a person, that you create using basic shapes like cubes and spheres, or lines and curves. Once you create these models, there are still quite a few stages that you will eventually need to learn if you want a finished result. You will need to go through a process called UV mapping, which prepares the model for texturing, then you need to texture your model like adding bricks on the side of a house mesh, or skin on the side of a human mesh. Finally, you will need to go through a process of compositing, which integrates the resulting 3D scene into your image or videos, with live actors and so on.
Before we go through all of these processes however, let’s start at the beginning. What do you need in order to create your own meshes? First, you need a computer. The main specifications you should look at for a modelling computer is memory and processor power. Then, you need a modelling software. There are dozens out there, so we’ll cover four options. If you just want to experiment and get a good feel as to what modelling is like, consider trying the free Google Sketchup. It’s the simplest option, and is very easy to learn. However, it is very basic and only provides you with limited features. If you want a middle of the road option, something not too expensive but that will allow you to try the full breadth of 3D modeling, you can try Carrara from DAZ3D which costs less than $200.
If your goal is to go pro and join a studio, then you should try either Maya or 3DS MAX, both from Autodesk, and both providing professional features. These options cost thousands of dollars, but these are what people use to create Hollywood movies. Finally, a more recent type of 3D modelling that has started to become very popular is sculpting, where instead of creating your models using shapes and lines, you sculpt them like clay. For that, the best option is ZBrush. Regardless of the choice you pick however, keep in mind that the learning curve will be steep. Try to find video tutorials and take it one step at a time. If you learn the software and techniques needed to create 3D models, you will soon be making all sorts of objects in no time.
 Now that you know what is involved in creating those spectacular scenes that we see in movies and video games, and that you have an idea of which software programs are out there, let’s go through some of the basic techniques in actually creating your first 3D model. When you initially open any of the modelling software available out there, the first view you get can be quite daunting. But do not worry, we will go through some of the main interface components you need to know about, and how you can make your own models.
Regardless of the application you picked, they all work in more or less the same way. In the center of your screen you have the viewport. That’s your main work area. Depending on your preferences and how your software is setup, typically you will either have a single viewport, or several. In 3D, you obviously have three dimensions: How wide the object is, also called the X coordinate, how deep the object is, referred to as Y, and how tall it is, using the coordinate Z. In order to view these three dimensions on a computer screen, you have two options. First, you can have multiple views from the top, the side and the front. These are called octogonal viewports. Or, you can have a perspective viewport, which shows you all three dimensions at once, allowing you to move around in 3D space. Most people select a configuration with four viewports: The three octogonal ones, and a perspective view.
Once you’re familiar with your viewports, and you learned the mouse and keyboard options to pan, zoom and rotate in those views, you can start learning what the various toolbars do. The easiest way to build a model is using basic shapes. All applications have several shapes available to you on the toolbars. Simply click on them and drag them around a viewport to create your first object. Now unless you’re trying to do a round planet or a square box, you’re going to want these shapes to interact with each others in order to create more complex shapes. There are many ways to do that. The easiest way is using boolean operations. These are additions and subtractions you can do in 3D space. For example, place a sphere in your viewport, then add a cube intersecting that sphere. By doing a subtraction, you can remove the area where both shapes touched.
As you can see, 3D modeling involves a lot of technique, and what we covered here is barely the tip of the iceberg. To truly make complex shapes you will need to learn about curves, modifiers, and eventually you may want to texture your models, animate them, add physics, lighting, rendering and so on. But hopefully, by playing with your selected modeling software, referring to its user manual, and perhaps using some video tutorials, you can start building meshes in no time.
Written by Dendory – sample work link.
CC images courtesy of wikipedia.
[shareaholic app="share_buttons" id="4703992"][shareaholic app="recommendations" id="4704000"]